Back when I first learned photography, digital cameras were a novelty and expensive. My first camera was an Olympus film camera with only one option for settings, manual . The ISO – film’s sensitivity to the light- was determined by the film you picked, with no previews, no retries, just shoot and hope for the best! While my photos weren’t spectacular, it was a fun learning experience.
Today, I have a fancy mirrorless camera with all the bells and whistles. While I love my camera after several trips, I realized lugging around a camera and multiple lenses—because let’s be honest, it’s never just one—gets really inconvenient, especially on short trips. So, I took the plunge and started traveling with just my phone. Scary? Yes. Liberating? Absolutely. Here’s why:
Lighten Your Load: Carrying a camera and lenses becomes a hassle when you’re walking miles to see all the sights.
Smartphones Are Powerful: Modern smartphones come with impressive lenses, multiple focal lengths, and features like RAW files and powerful editing tools.
Quick and Discreet: Snap a photo in seconds and stash your phone away. It’s also perfect for capturing street scenes or candid moments without drawing attention.
But even with a great phone, knowing a few tips and tricks can make your photos look like they were taken with a pro camera. So here are a few tips to help you bring those stunning images back home.
Three Basic Elements for a Well-Balanced Picture
Photography can be a deep dive, but let’s keep it simple and fun! I’m going to start with my top 3 essential elements that will instantly improve your photos. Don’t worry, I’ll sprinkle in more tips later, but let’s nail these first.
Composition: Crafting Your Story
Composition is the heart of photography. What you see through your lens is your story—your way of showing the world what you find beautiful or interesting. While cameras can’t capture everything our eyes do, good composition allows you to guide the viewer’s eye and share your unique perspective.
One of the most buzzed-about tricks in photography is the Rule of Thirds. But what’s all the fuss about? Well, it’s not just hype—this little rule is your new BFF when it comes to snapping photos.
Think of it like this: The Rule of Thirds is the secret ingredient that turns your shots from “meh” to “wow!” with almost zero effort. Picture a grid that slices your frame into nine equal squares, thanks to two horizontal and two vertical lines. Got that mental image? Awesome! Now, here’s the fun part: instead of centering your subject, you’re going to place the most important bits along those lines or, even better, at their intersections.
What’s the big deal? This simple trick makes your photos feel balanced and way more engaging. It adds a little drama and keeps the viewer’s eyes dancing across the image, making it way more captivating.
How to use it:
For Landscapes, put the horizon on the top or bottom third, not dead center. It changes everything!
Buildings for vertical lines align one of the building’s edges along one of the vertical lines, especially if you want to highlight the height or symmetry.
For horizontal lines If the building has a distinct roofline or any horizontal features, position them along one of the horizontal lines. This is especially great if you want to emphasize the building’s connection to the sky or ground.
Portraits: Position your subject’s eyes on the top third line. It makes the portrait feel more engaging and natural.
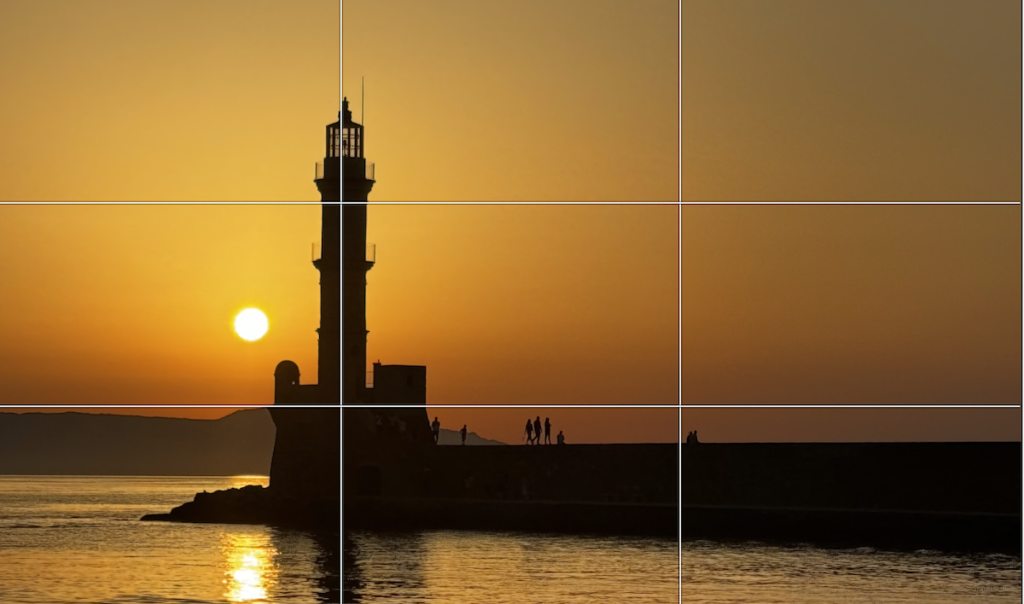
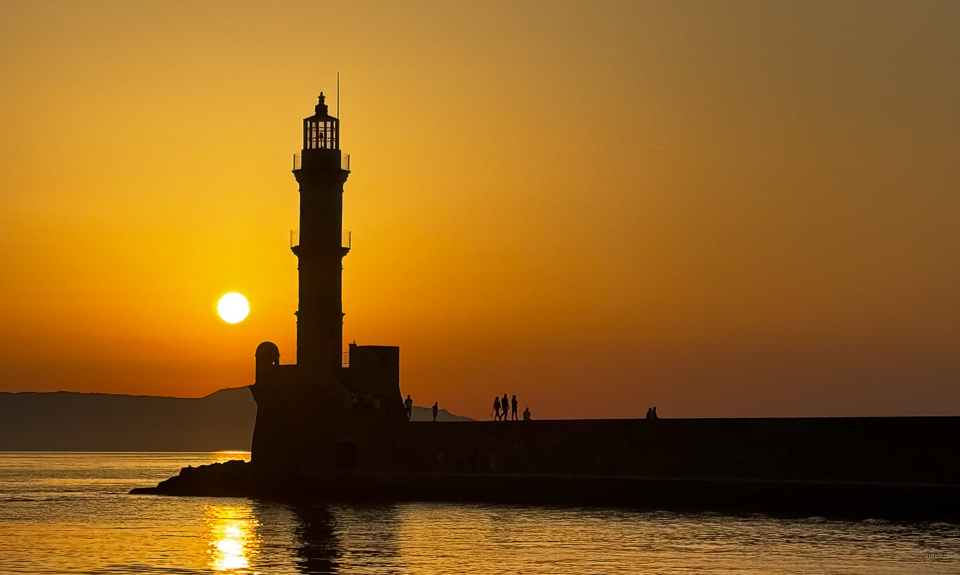
Play around with different placements to see what looks best. Change your perspective, take pictures from unusual angles, get down on the ground, look up, or from the side. You’ll be surprised at how much more interesting your photos can be compared to other travelers’ shots from the same location. Just be mindful of what else is in the frame—no one wants a photobomber or a sneaky trash can stealing the spotlight! Keep in mind though, bringing the human aspect to landscape photo, it could contribute to the story.


Boost Your Photos with Leading Lines and Framing:
Leading lines are an awesome way to compose your shots. They naturally draw the viewer’s attention right where you want it—whether it’s the most stunning part of the scene or a detail you want them to notice.
Framing is another killer technique. It works like a visual guide, directing the viewer’s eyes straight to what you’ve framed, making it the star of the shot.
And don’t forget about light! People’s eyes are naturally drawn to the brightest part of a photo. So if you want to make something pop, try darkening the surrounding areas to spotlight your main subject. It’s a simple trick to make sure your audience sees exactly what you want them to.

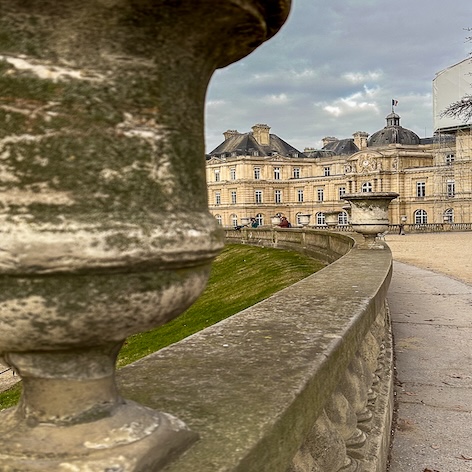
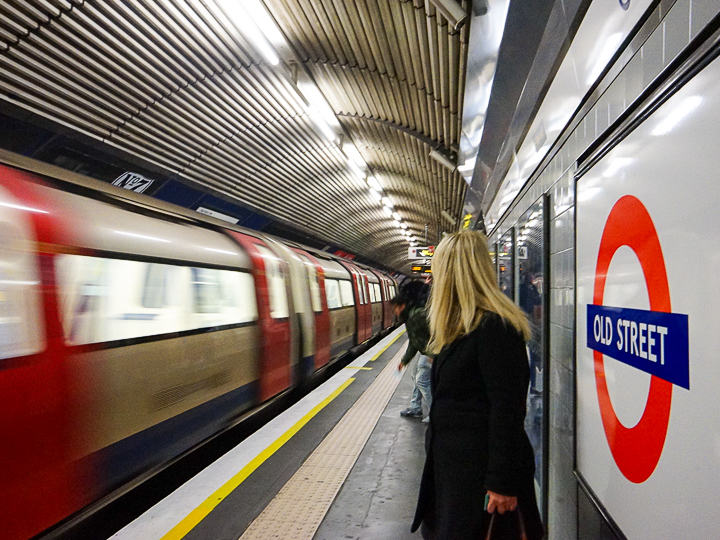
Storytelling: One more thing to consider when choosing your subject is to make sure you are collecting different kinds of information, having a variety of pictures of everyday events, restaurants, local spots etc will provide a sense of storytelling. Not every photo needs to be the “hero” shot—the most amazing one of the bunch. You also need other, less grandiose photos to capture the essence , the locals, the look of the streets, and the peculiar things that make that place unique. All these elements come together to tell the story about your trip, which is what you’ll want to share with your family and friends



Lighting: Set the Mood
Lighting is everything in photography. The time of day can completely transform the mood of your photo. Early morning and late afternoon—known as the Golden Hour—are the best times to shoot. The sun is low, casting soft, warm light that’s flattering for any subject. No harsh shadows, no squinting—just beautiful, even lighting that makes everything look magical.
When traveling, you’ll likely want to capture as much as possible, no matter the lighting conditions. While photos can turn out great in harsh light, there are a few things to keep in mind when shooting with your phone.
In high-contrast lighting, it’s helpful to find a shaded spot where you can clearly see your phone’s screen to select your subject and frame the shot correctly. Unlike DSLR or mirrorless cameras, which allow you to focus and isolate light through a viewfinder, your phone’s screen can be more challenging to use in bright conditions. I have found myself taking pictures completely blinded by the light.
Your photos will usually turn out better if you avoid pointing your lens directly at the sun, unless you’re capturing a sunrise or sunset. If your subject is in front of the sun, you subject most likely become a silhouette, if this is a person. Instead, try to position the light source to the side of the subject or behind you.
For night shots, most phones perform well in low-light conditions, but I recommend bringing a small tripod to avoid blurry pictures. You can check out my post here on shooting at night with your phone.


Here’s a quick rundown of the essentials:
Direction: Where the light hits your subject matters. Front light flattens, side light adds depth, backlight creates silhouettes, and top or bottom light gives dramatic effects.
Intensity: Bright or dim? The strength of your light affects how sharp or soft your shadows will be.
Quality: Hard light makes crisp shadows; soft light smooths them out. Think of the sun on a clear day versus a cloudy one.
Color: Light can be warm (yellow/orange) or cool (blue). Use this to set the mood—warm feels cozy, cool feels fresh.
Contrast: High contrast means bold shadows and highlights; low contrast is more mellow and even.
Light Source: Natural light is soft and ever-changing, while artificial light is consistent and controllable.
Position & Distance: Moving your light source closer softens the light; further away makes it harsher. Play around to see what works- in a case of an indoor picture you could position your subject closer or farther away from the light if you cannot move the source.
For night shots, most phones perform well in low-light conditions, but I recommend bringing a small tripod to avoid blurry pictures. You can check out my post here on shooting at night with your phone.
Focus: Keep It Sharp
Getting sharp photos with your iPhone is super simple once you know the ropes:
Tap for Clarity: Just tap where you want the focus, and boom—a yellow box shows up, making sure that spot is crystal clear. The exposure adjusts automatically, so you’re good to go.
Lock It In: Need to keep that focus steady? Press and hold on your focus point until “AE/AF Lock” pops up. Now you can move around without messing up the focus—perfect for those tricky angles.
Portrait Mode Perfection: For that sweet, blurred background, switch to Portrait mode. It’ll zero in on your subject and make the background melt away—easy and professional-looking.
Macro Close-Up: If your iPhone’s got macro mode, bring it in close and watch it automatically switch to capture those tiny details. Tap to tweak if you need that extra sharpness.
Night Moves: When it’s dark, Night mode takes over, snapping multiple shots and blending them to keep things sharp. Just keep your hand steady, and you’ll nail the focus even in low light.
These methods allow for flexible and precise focusing, making it easy to capture sharp images in various conditions.
And there you have it! Now it’s time to get out there and start playing with these ideas. Pick a spot in your city or town that catches your eye—then go wild! Shoot it at different times of day, from all kinds of angles, and make sure you frame it just right, without any distractions sneaking in. Keep experimenting until you nail that perfect shot. This fun little challenge will sharpen your eye for composition and lighting. Before you know it, you’ll be snapping incredible shots with your phone on your travels with confidence!
Have fun! P.
